Why Proper Attic Ventilation Matters for Your Home
An attic fan installation is one of the most effective ways to reduce cooling costs and protect your home. During summer, an unventilated attic can reach 150°F, forcing your air conditioner to work harder and driving up energy bills.
Quick Installation Overview:
- Cost: DIY materials $100-$400; professional installation $975-$2,700
- Energy Savings: Up to 30% reduction in cooling costs
- Temperature Control: Keeps attic within 5-10°F of outside temperature
- Installation Time: 4-6 hours for DIY; 2-3 hours for professionals
- Best Location: Gable-end walls or roof-mounted near the ridge line
An attic fan pulls hot air out of your attic while drawing cooler outside air in through existing vents. This process can significantly reduce the heat load on your home’s upper floors and extend the life of your roofing materials.
Proper attic ventilation also prevents moisture buildup that leads to mold, protects your roof from heat damage, and can save you hundreds annually on energy costs. Understanding the basics will help you improve your home’s comfort and efficiency.
Understanding Attic Fans Before You Begin
On a sweltering summer day, your attic can reach temperatures of 150°F or higher, acting like a giant oven above your living space. This superheated air radiates down, forcing your air conditioner to work overtime and increasing your energy bills.
An attic fan installation solves this by acting as an exhaust system. It pulls hot, stagnant air out of the attic while drawing cooler outside air in through existing vents. This keeps your attic temperature much closer to the outdoor temperature, reducing heat transfer into your home and giving your AC a break. The benefits extend beyond comfort and savings, as proper ventilation also protects roofing materials from heat damage and prevents moisture buildup that can lead to mold.
What is an Attic Fan vs. a Whole House Fan?
Homeowners often confuse these two, but they work differently.
- An attic fan ventilates only the attic space. It pulls hot air out of the attic and draws fresh air in through attic vents, preventing heat from building up above your living area.
- A whole house fan cools the living space itself. Installed in the ceiling, it pulls cool evening air in through open windows and exhausts it through the attic, creating a cooling breeze throughout the house.
In short, an attic fan prevents heat buildup, while a whole house fan actively cools your living space.
Types of Attic Fans and Their Costs
Choosing the right fan depends on your home’s needs and your comfort with the installation requirements.
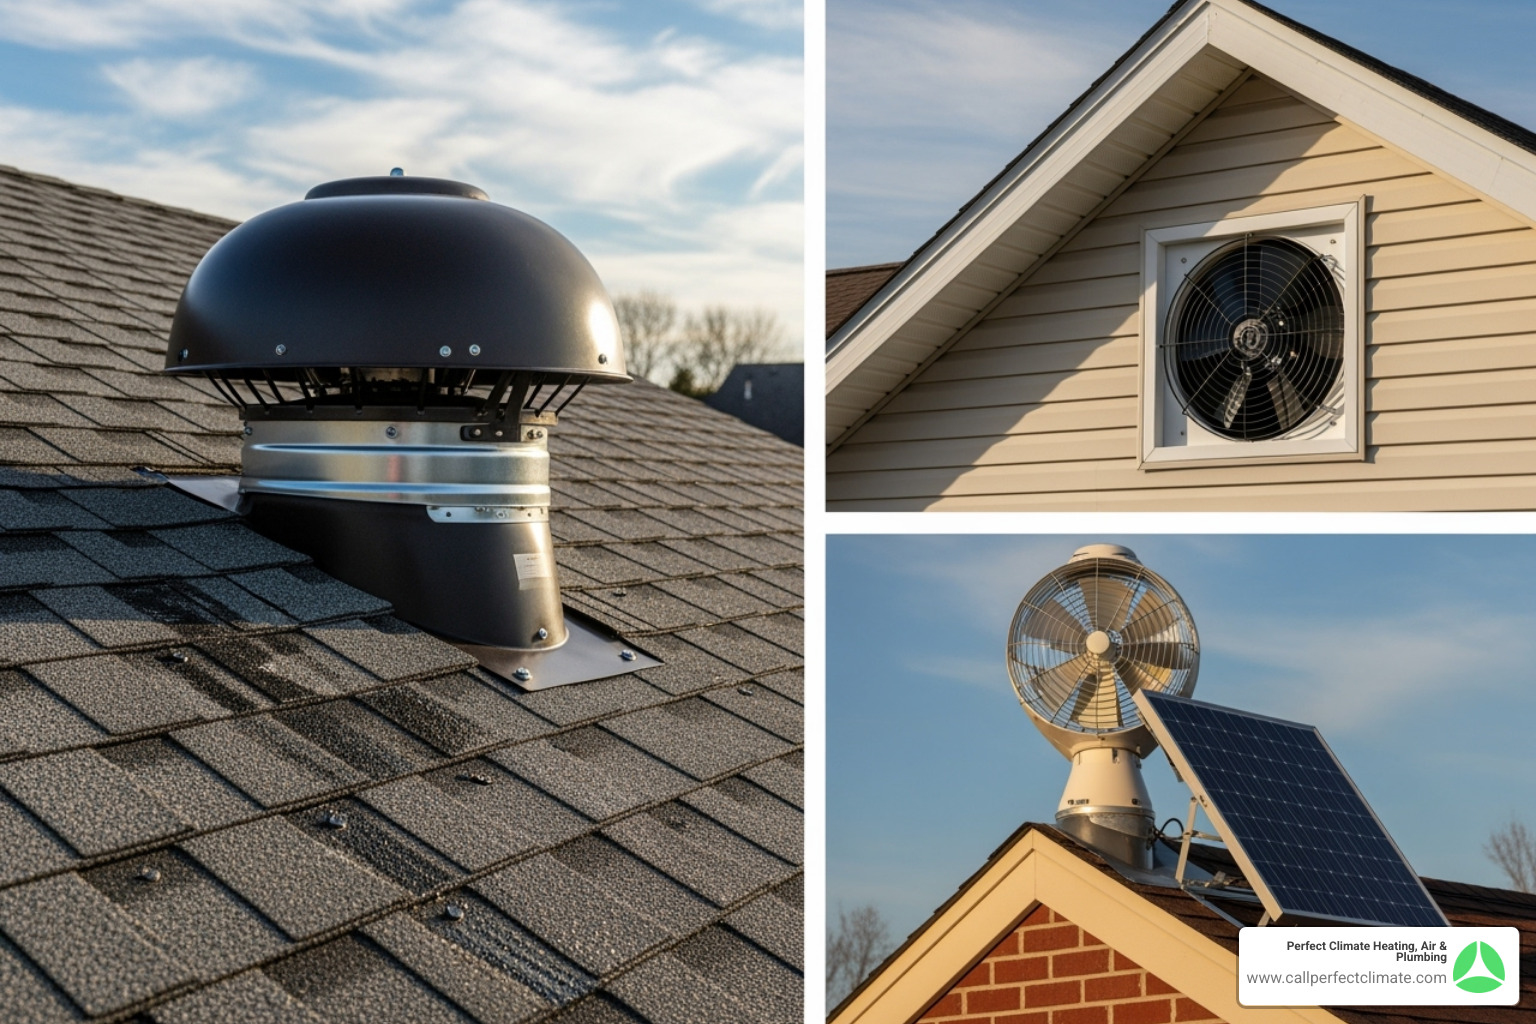
Electric fans are reliable workhorses that provide consistent performance. Many include thermostats that automatically activate the fan at a set temperature and humidistats to control moisture. They require electricity to run, but the energy savings from reduced AC use typically offset this cost.
Solar-powered fans are an eco-friendly option that operates for free after installation, running silently on sunlight. Installation is often simpler as it doesn’t require electrical wiring. However, they don’t run on cloudy days or at night.
| Type of Attic Fan | Cost Range | Pros | Cons |
|---|---|---|---|
| Electric Fans | Moderate | Consistent performance, high CFM output, works 24/7, thermostat/humidistat control | Requires electrical work, ongoing operating costs |
| Solar-Powered Fans | Higher upfront | No operating costs, eco-friendly, easier installation, silent operation | Weather dependent, no nighttime operation |
| Roof-Mounted Fans | Varies by type | Optimal placement for hot air removal, works with any attic layout | Requires roof penetration, more complex installation |
| Gable-Mounted Fans | Varies by type | Easier installation, uses existing vents, less visible | Limited effectiveness in complex attics |
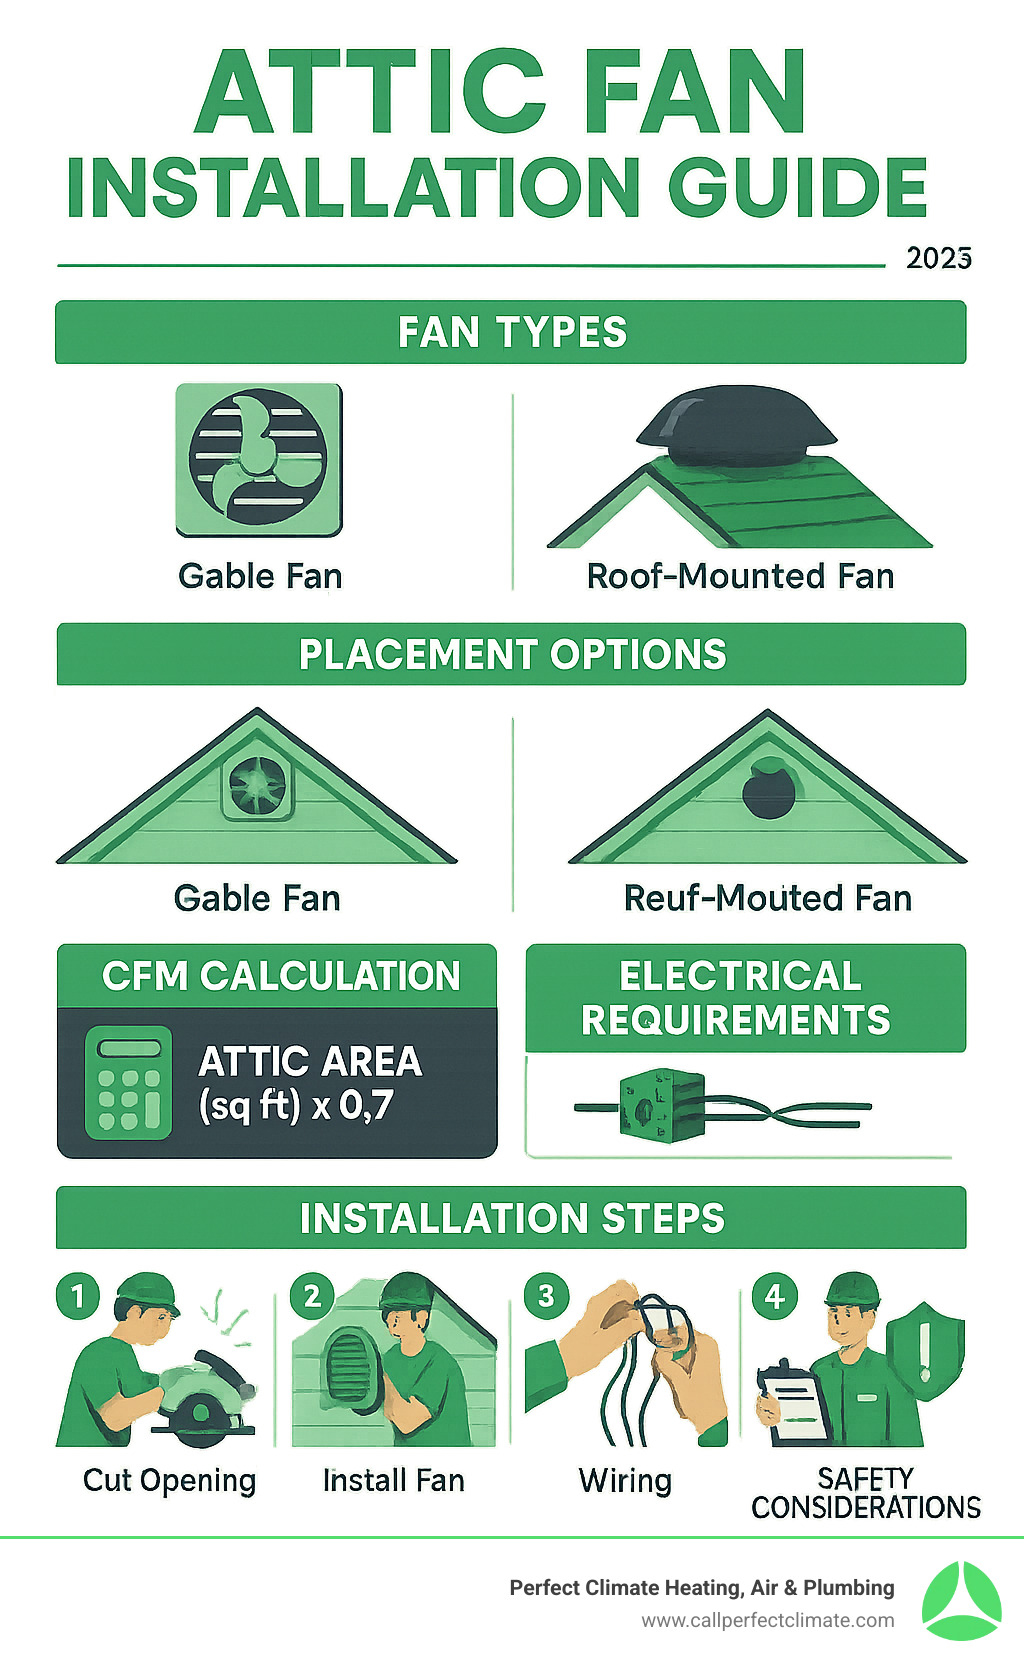
Roof-mounted fans install on your roof slope, making them highly effective at capturing the hottest air at the attic’s peak. This installation requires cutting a hole in the roof.
Gable-mounted fans are installed in the triangular vents at the ends of a house, which is often a more straightforward installation if these vents already exist.
Tools and Materials for the Job
Gathering your tools and materials beforehand will make the installation process smoother.
- Safety Gear: Safety goggles, dust mask, work gloves, long-sleeved shirt, and pants.
- Tools: Stud finder, measuring tape, jigsaw, drill with various bits, wire strippers, and a voltage tester (essential for electrical work).
- Materials: The fan unit, quality sealants and a caulking gun, plywood for mounting support (if needed), appropriate electrical wiring, and weatherproof screws.
Planning: Sizing and Location
Proper planning is key to an effective attic fan installation.
Sizing Your Fan: To find your minimum CFM (Cubic Feet per Minute) requirement, multiply your attic’s square footage by 0.7. For a 1,200 sq. ft. attic, you’d need at least an 840 CFM fan. It’s better to oversize slightly than to undersize.
Intake Ventilation: Your fan is only as good as its air intake. You need about 1 square foot of net free intake area for every 300 CFM of fan capacity. This air is typically drawn in through soffit, gable, or ridge vents. Without enough intake, the fan will struggle and may even pull conditioned air from your living space.
Location: For roof-mounted fans, the best spot is near the ridge line where hot air collects, usually 3-5 feet below the peak. Gable-mounted fans are installed behind an existing gable vent, using the vent on the opposite end of the house for intake.
Step-by-Step Guide to Attic Fan Installation
With the planning complete, it’s time to install your fan. This guide covers the essential steps for both roof-mounted and gable-mounted fans. Safety is the top priority, especially when working with electricity or at heights.
Step 1: Prepare the Installation Area
Proper preparation prevents mistakes and ensures safety.
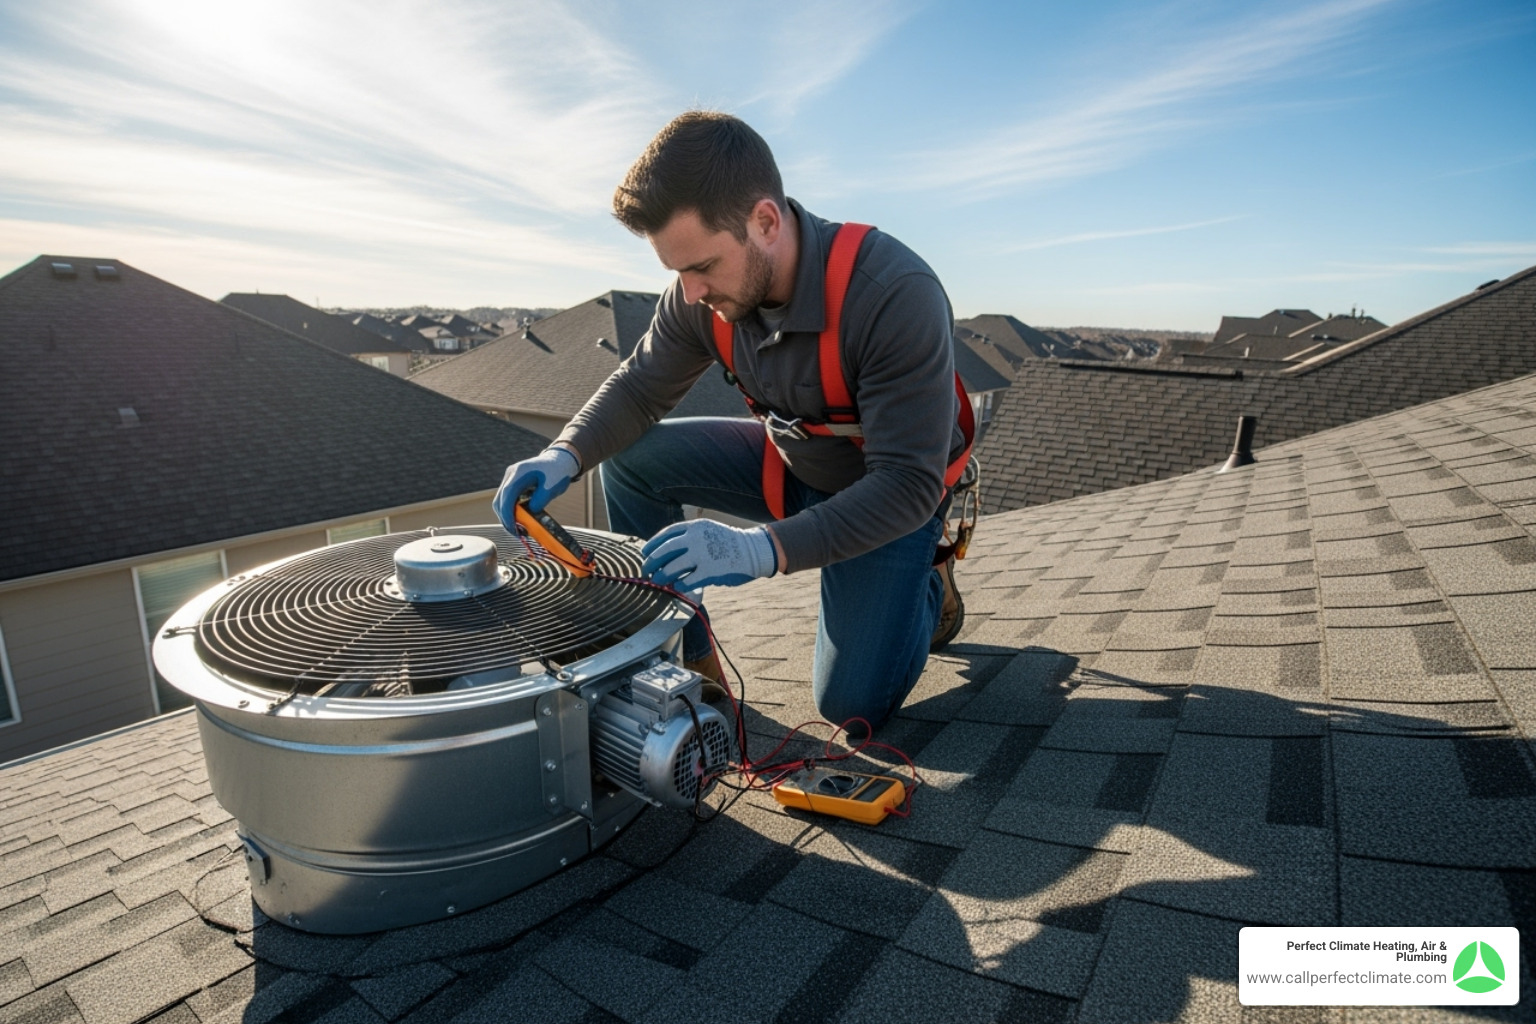
- Turn Off Power: Shut off the circuit breaker for the attic at your electrical panel. Use a voltage tester to confirm the power is off for any wires in the work area.
- Clear Workspace: Move any stored items to create a safe, clear area to work.
- Wear Safety Gear: Put on your safety goggles, dust mask, gloves, and long sleeves to protect against dust and insulation.
- Use Work Boards: Lay sturdy boards across the attic joists to create a stable platform. Stepping between joists can result in a foot going through the ceiling below.
- Locate Framing: Use a stud finder to locate the rafters or joists that will anchor the fan.
- Mark Cutting Lines: Use the fan’s template to mark your cutting lines. For roof-mounted fans, drill a pilot hole from inside the attic through the roof to serve as a guide.
Step 2: Cut and Mount the Fan
This process differs slightly for roof-mounted and gable-mounted fans.
For roof-mounted fans:
- Working from the roof, use your pilot hole as a center point to position the template and trace the opening.
- Use a jigsaw to cut through the shingles and roof decking.
- Gently pry up the shingles around the opening to allow the fan’s flashing to slide underneath.
- Center the fan over the hole, ensuring the flashing is under the upper shingles and over the lower ones. Secure it with weatherproof screws.
For gable-mounted fans:
- From inside the attic, you may need to build a mounting frame. Cut a piece of plywood to cover the existing gable vent opening.
- Cut a hole in the center of the plywood for the fan.
- Mount the fan to the plywood, then secure the entire assembly over the vent opening.
Sealing is critical for both types. Apply weatherproof caulking or roofing mastic generously around all edges where the fan meets the roof or wall to prevent leaks. Seal any interior gaps with expanding foam insulation.
Step 3: Electrical Wiring and Connections
If you are not comfortable with electrical work, hire a licensed electrician. Safety is paramount.
- Power Source: Tapping into an existing attic circuit may be possible, but a dedicated circuit from the main panel is the best practice for electric fans to avoid overloads.
- Thermostat: Mount the thermostat (if separate) where it can read the ambient attic temperature, away from the fan’s direct airflow.
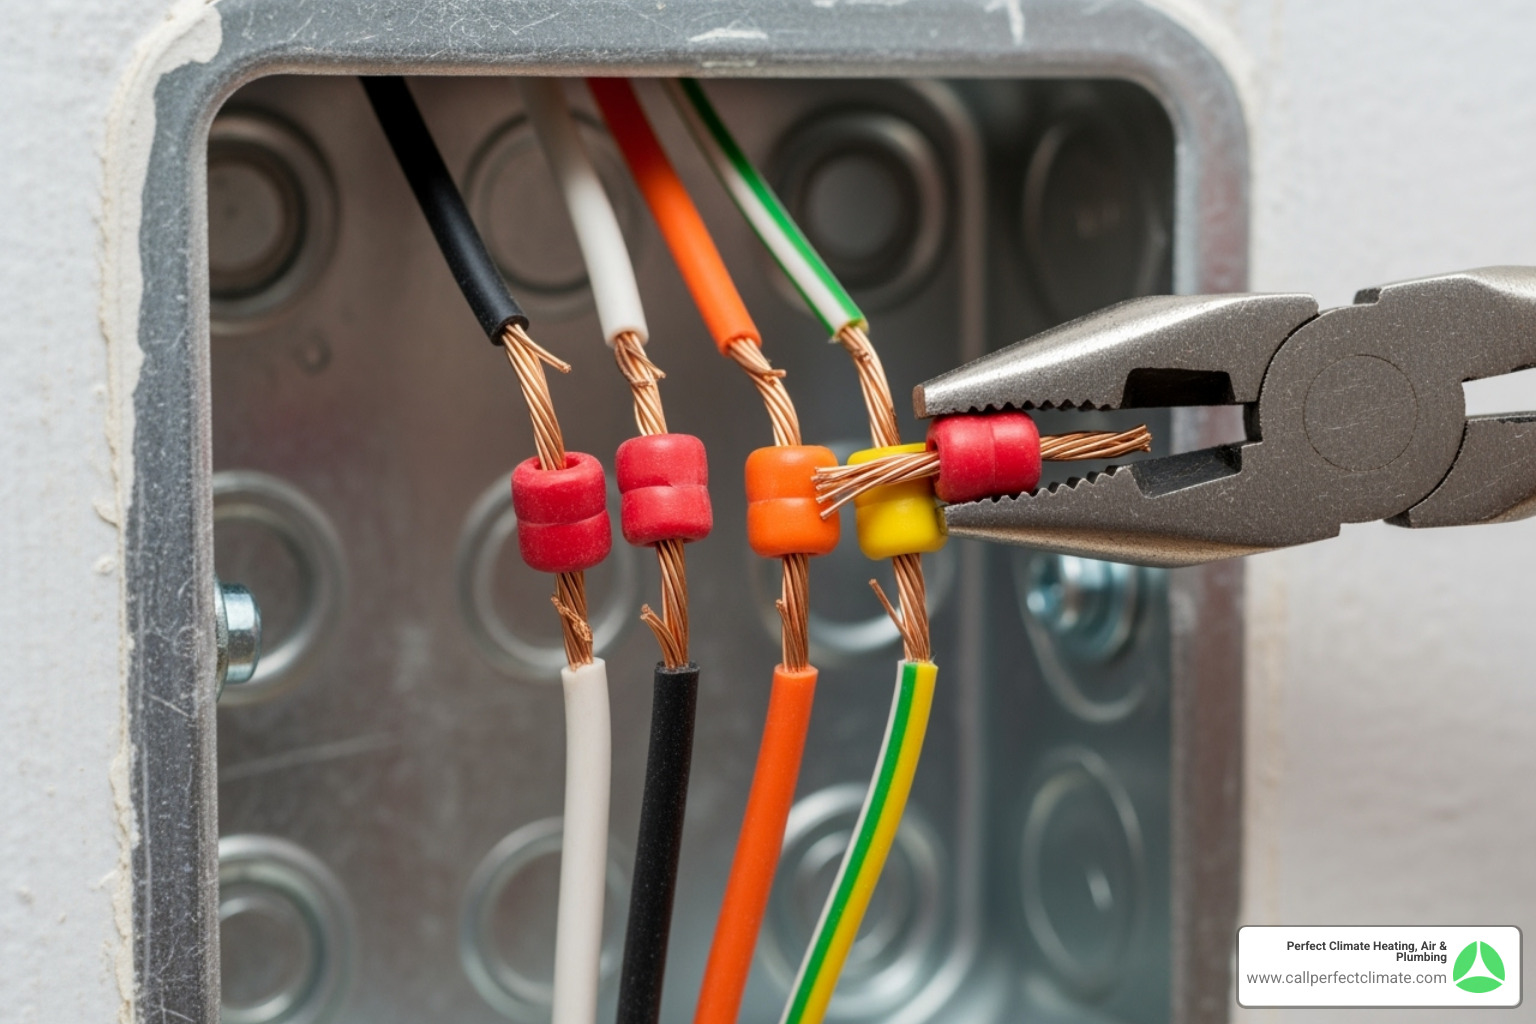
- Wiring: With the power off, follow the manufacturer’s diagram. Connect the house’s black (hot) wire to the fan’s black wire, white (neutral) to white, and the bare copper or green (ground) wire to the fan’s ground screw. Secure connections with wire nuts.
- Grounding: Properly grounding the fan is a crucial safety measure that protects against electrical shock.
- Code Compliance: All electrical work must adhere to local code requirements.
Step 4: Test the Fan
After installation, it’s time to test your work.
- Restore Power: Turn the breaker back on at the electrical panel.
- Test Function: Press the fan’s test button or temporarily lower the thermostat setting to below the current attic temperature to ensure it turns on.
- Check Operation: Listen for loud rattling or excessive vibration, which could indicate a loose part. A low hum is normal.
- Verify Airflow: Feel for a strong current of air being exhausted from the attic. Check that air is being drawn in through your intake vents.
If everything works correctly, your attic fan installation is complete!
Maintenance, Troubleshooting, and When to Call a Pro
Regular maintenance and basic troubleshooting will keep your attic fan running efficiently for years. Knowing when to handle an issue yourself and when to call a professional is key.
How to Troubleshoot Common Attic Fan Issues
Before calling for service, check these common problems:
- Fan Won’t Turn On: Check for a tripped circuit breaker. Verify the thermostat is set correctly and the attic is hot enough to trigger it. A voltage tester can confirm if power is reaching the unit. If power is present, the issue could be a loose wire or a failed motor.
- Unusual Noises: Rattling or clanking often means loose mounting screws that need tightening. Check for debris like leaves or twigs obstructing the blades. A grinding or squealing noise may indicate worn motor bearings, which usually requires professional service or replacement.
- Excessive Vibration: This is often caused by loose mounting hardware or debris on the fan blades, which throws the fan off balance. Tighten all screws and clean the blades.
- Inefficient Cooling: This can happen if the fan is undersized (insufficient CFM) for the attic. More commonly, it’s due to blocked intake vents (e.g., insulation covering soffit vents). Ensure all intake vents are clear. Also, sealing air leaks from your living space into the attic can prevent the fan from pulling your conditioned air out. For more help, see our guide on Diagnosing HVAC issues.
Basic Attic Fan Maintenance
Perform these checks annually, preferably in the spring, to prepare for summer heat.
- Turn Off Power: Always disconnect power at the circuit breaker before performing maintenance.
- Clean Fan Blades: Wipe away dust and debris from the blades with a damp cloth to improve efficiency and balance.
- Check Wire Connections: Visually inspect all wiring for corrosion or looseness. Ensure wire nuts are secure.
- Inspect Sealant: Check the caulking around the fan’s base for cracks or peeling. Reapply weatherproof sealant as needed to prevent leaks.
DIY Attic Fan Installation vs. Hiring a Pro
Deciding between DIY and professional installation depends on your skills and the project’s complexity.
A DIY approach can be successful if you have solid carpentry and electrical skills and are comfortable working in attics or on roofs. Solar-powered fans are often more DIY-friendly due to the lack of complex wiring.
Hiring a professional is the safer choice in several situations:
- Complex Roofs: Tile, metal, or flat roofs require special techniques to install a fan without causing leaks.
- Electrical Work: If you need to run a new circuit or are not confident in your wiring skills, a licensed electrician is essential for safety.
- Working at Heights: Professionals have the safety equipment and experience to work on roofs safely.
At Perfect Climate Heating, Air & Plumbing, we handle attic fan installations across Haubstadt, Evansville, Princeton, and Newburgh, IN. Our technicians ensure your fan is installed safely and correctly, evaluating your home’s entire ventilation system for optimal performance. Professional installation provides peace of mind and warranty protection. Learn more about Why You Should Hire a Professional for Your HVAC System.
Frequently Asked Questions about Attic Fan Installation
Homeowners often have questions about attic fan installation. Here are answers to some of the most common ones we receive.
How much can I really save with an attic fan?
The savings depend on your climate, home insulation, and how hot your attic gets. By actively removing superheated air, an attic fan reduces the heat load on your home, meaning your air conditioner runs less. Homeowners can see cooling cost reductions of up to 30% during peak summer months. In a climate like Indiana’s, where summers are hot and humid, an attic fan can pay for itself in energy savings within a few seasons.
How does an attic fan help my roof last longer?
Extreme heat trapped in an attic can literally bake your roofing materials from the inside out. This is especially damaging to asphalt shingles, causing them to become brittle, crack, and deteriorate prematurely. An attic fan installation mitigates this by keeping the attic temperature much lower, reducing heat stress on the entire roofing system.
In the winter, proper ventilation helps prevent moisture buildup that can lead to mold and rot. It also helps prevent ice dams, which form when snow melts and refreezes at the roof’s edge, causing significant water damage. By controlling both heat and moisture, an attic fan is a key part of protecting your roof and extending its lifespan.
Can I install an attic fan if I don’t have gable vents?
Yes. While gable vents are one option, they are not a requirement for an attic fan. If your home lacks gable vents (which is common with certain roof styles like hip roofs), a roof-mounted attic fan is the ideal solution. These units are installed directly on the roof slope, near the peak, to exhaust hot air where it collects most.
The most critical factor for any attic fan installation is ensuring there is adequate intake ventilation. The fan needs to pull in cooler, outside air to replace the hot air it’s pushing out. This intake air typically comes from soffit vents (under the eaves) or ridge vents. Without sufficient intake, a fan cannot work effectively and may even create negative pressure that pulls conditioned air from your living space. We always assess a home’s entire ventilation system to ensure a balanced airflow for maximum efficiency.
Conclusion
An attic fan installation is a smart investment in your home’s comfort, efficiency, and longevity. By actively removing trapped heat, an attic fan lowers your cooling costs, makes your living space more comfortable, and protects your roof from premature aging caused by extreme temperatures and moisture.
Whether you choose a DIY path or hire a professional, you now have the knowledge to make an informed decision. You understand the importance of proper sizing, placement, and ventilation to ensure your fan operates effectively. A well-installed attic fan provides peace of mind, knowing you’ve taken a proactive step to improve your home.
At Perfect Climate Heating, Air & Plumbing, we’ve helped countless homeowners in Haubstadt, Evansville, Princeton, and Newburgh with professional attic fan installation. If you’re not comfortable with roofing, electrical work, or navigating a hot attic, our experienced team is here to help. We ensure your installation is performed safely, meets all local codes, and is optimized for your home’s specific needs.
Ready to take the next step toward a cooler, more comfortable home? For expert assistance with your home’s ventilation and HVAC needs in Chandler, IN, contact our team today. We’re always excited to help our neighbors achieve optimal comfort and energy savings.

